No Products in the Cart
DIY Mattress Guide
Written by Zulekha Nishad

Last Updated November 11, 2026
Building your own mattress is a satisfying project, and it lets you choose every layer you sleep on. This guide breaks a mattress down into its three parts, compares the materials you can use, suggests layer combinations that work, and walks you through the build step by step. It also covers the step most DIY guides skip, fire safety, and an easier option if you'd rather assemble a ready-made kit than cut and sew.
Quick answer
A DIY mattress has three parts: a support core (pocket coils, firm latex or high-density foam, usually at least half the total height), one or two comfort layers (softer latex, foam or wool, often 2 to 3 inches each) and a cover. Stack the firmest layer at the bottom and the softest on top, test the feel, then close it in a zippered cover. Because a homemade mattress hasn't been tested to US flammability standards, build in a fire barrier made for mattresses. For a shortcut, Turmerry's DIY Hybrid Mattress ships 8-inch pocket coils, one or two 2-inch organic Dunlop latex layers and a zippered, wool-lined organic cotton cover that you put together in about 15 to 30 minutes.
Key Takeaways:
- Building your own mattress lets you choose every layer, from the support core to the firmness and material of each comfort layer (latex, memory foam or poly foam).
- Every mattress has three main parts: a support layer, a comfort layer and a cover. Put the firmest layer at the bottom and the softest on top.
- Natural materials such as natural latex, wool and cotton are breathable and long lasting. If you want certified organic materials, look for a certificate you can check, such as GOLS for latex or GOTS for cotton.
- DIY can save money if you find good materials at a fair price, but it isn't always cheaper once you add quality latex or coils, a cover, a fire barrier and shipping, and a homemade build has no trial or warranty.
- The build itself is simple: measure, cut, layer, test and cover. Keep layers loose inside a zippered cover rather than gluing them, so you can swap one later.
- Mattresses sold in the US must pass federal flammability tests; a homemade one hasn't. Use a fire barrier made for mattresses and check any local rules.

Breaking Down the Basics
Before you buy anything, it helps to know what goes inside a mattress. You don't need to be a mattress engineer: at its core, every mattress is built from the same three parts.
1
Support layer
The foundation of the mattress. It keeps you from sinking too far and carries most of your weight. Pocket coils, firm latex or high-density poly foam are the usual choices. Plan for it to be the thickest part, at least half the total height.
2
Comfort layer
The cushioning part you feel when you lie down. One or two softer layers of latex, memory foam, poly foam or wool shape the feel and give pressure relief at the shoulders and hips.
3
Cover
Holds the layers together and keeps out dust, crumbs and the occasional late-night snack spill. A zippered cover lets you get back inside to adjust or replace a layer.
The order matters: firmest at the bottom, softest at the top. If you use two comfort layers, put the firmer one underneath. That middle layer is sometimes called a transition layer, and it smooths the change from a soft top to a firm core so you don't feel the support layer through the cushioning.
Now that you know the anatomy of a mattress, let's look at whether a DIY build makes sense for you, and then at the materials.
Is a DIY Mattress Worth It?
A homemade mattress can be great, but it's worth going in with clear expectations. Here's the honest trade-off.
Pros
- You choose every material, thickness and firmness, so you know exactly what you sleep on.
- When one layer wears out or feels wrong, you can replace just that layer instead of the whole mattress.
- It can cost less, especially if you find good remnants or offcuts.
- It's a fun project, and you get a bed made for your body.
Cons
- It isn't always cheaper: quality latex, coils, a well-made cover, a fire barrier and shipping on each part add up.
- No trial period or warranty covers the finished mattress, only (at best) the individual parts.
- Cutting foam evenly and sewing a snug cover take time, space and some skill.
- A homemade mattress hasn't been tested to federal flammability standards (more on that below).
Tip
Want the custom feel without the cutting and sewing? A kit-style mattress with a zippered cover, like our DIY Hybrid Mattress, gives you separate layers you can rearrange, with a trial and warranty on the whole thing. We cover it further down.
Scoring Affordable Mattress Materials
Making your own mattress doesn't have to be expensive. The key is spending where it counts (the support core and the layer you lie on) and saving on the rest.
Support Core Options
| Support core | Feel | Typical thickness | Keep in mind |
|---|---|---|---|
| Pocket coils | Bouncy, with airflow through the core | About 6-8 inches | Sold as a ready-made coil unit; needs comfort layers on top and a cover that holds it square |
| Firm latex | Springy, supportive, quiet | About 6 inches (often two 3-inch layers) | Heavy and usually costs more, but tends to last a long time |
| High-density poly foam | Firm and stable | About 4-6 inches | The budget choice; check the density, because low-density foam softens sooner |
Foam Materials
Memory foam and poly foam are among the most common and affordable materials for mattress layers. Memory foam is popular for pressure relief, especially with side sleepers who want cushioning around their hips and shoulders, though it responds slowly and some people find it holds heat. Poly foam is often used as a support layer or a budget-friendly comfort layer.
Natural latex is another excellent option. It's made from the sap of rubber trees, it's springy and breathable (latex layers are usually pinholed for airflow), and it holds its shape well over the years. Many latex mattresses use firmer latex at the base and softer latex on top for a balanced feel. Latex comes in two types, Dunlop and Talalay; both are real natural latex and the choice is mostly about feel. Our Dunlop vs. Talalay guide explains the difference.

| Comfort material | How it feels | Good for | Watch for |
|---|---|---|---|
| Natural latex | Responsive and springy; easy to move on | Sleepers who want cushioning without a "stuck" feeling | Heavier and pricier than poly foam; "organic" should come with a certificate, such as GOLS |
| Memory foam | Slow, deep contouring | Sleepers who like a hugging feel | Can feel warm; slower to change position on |
| Poly foam | Light and simple | Tight budgets, guest beds | Lower-density foam softens and wears sooner |
| Wool batting | A thin, plush, breathable layer | Topping the comfort layer or lining the cover | Compresses over time; adds little thickness |
Where to buy foam and latex: online foam and latex retailers sell layers in standard mattress sizes and several thicknesses, and many let you choose the firmness, so you can tailor the build for side, back or stomach sleeping. Our mattress firmness scale helps you pick a level. If a seller calls latex "organic," ask for the certificate number so you can look it up.
Budget hack: upholstery shops sometimes sell foam remnants or offcuts at a discount. You can occasionally find high-density foam or latex for much less than you'd pay at a mattress store. Check that offcuts are the same thickness and firmness before you buy, or your sleep surface will be uneven.
Fabric for the Mattress Cover
The cover holds everything together, protects the layers and adds to the feel. It's separate from a mattress protector, which goes over the finished mattress like a fitted sheet.

Here are some good options:
- Natural wool: wool is breathable, handles moisture well and is naturally flame resistant, which is why many latex and natural mattresses use a wool layer inside the cover. You can quilt wool batting into the cover or lay a wool layer under it.
- Cotton or bamboo: breathable fabrics that suit people who sleep hot. Cotton is durable and soft; look for GOTS certification if you want organic cotton.
- Stretch knit: a knit with some stretch fits snugly over the corners and is forgiving if your measurements are slightly off.
Where to buy fabric: local fabric stores and online retailers carry durable mattress ticking, cotton and knit fabrics. Choose a fabric made for daily wear rather than a light dress-weight cotton.
Adhesives, Zippers and Other Supplies
You'll need a few basic supplies to hold everything together:

- Zipper: a long, heavy-duty zipper along one or three sides lets you open the cover to adjust, rotate or replace layers. It's the single most useful upgrade for a DIY mattress.
- Thread or Velcro strips: heavy-duty thread is essential if you're sewing. Velcro strips can hold a flap closed or keep layers from creeping, without anything permanent.
- Fabric adhesive: handy for closing seams if you don't sew. Skip gluing the foam or latex layers together, though: loose layers in a snug cover are easier to swap, rotate and air out.
- Tools: a tape measure, a long straightedge, a marker, and a serrated or electric knife for cutting foam.
How Thick Should Each Layer Be?
Most adults are comfortable on a mattress 10 to 12 inches thick, with a support core that makes up at least half of that. These combinations are good starting points; see our mattress thickness guide for more on choosing a total height.
| Build | Support layer | Comfort layer(s) | Total | Feel and fit |
|---|---|---|---|---|
| Firm and simple | 6" firm latex or high-density foam | 2" medium or firm | About 8" | Firm; back and stomach sleepers, guest beds, kids |
| Balanced hybrid | 8" pocket coils | 2" latex | About 10" | Bouncy with a cushioned top; most sleepers |
| Plush hybrid | 8" pocket coils | Two 2" latex layers, firmer one underneath | About 12" | More cushioning; side sleepers and couples |
| All latex | Two 3" firm latex layers | 3" medium or soft latex | About 9" | Springy and quiet; easy to fine-tune by swapping a layer |
Then match the comfort layer to how you sleep:
- Side sleepers: a softer comfort layer (soft or medium), 2 to 4 inches total, so the shoulders and hips can sink in a little.
- Back sleepers: medium to firm, so the hips don't sink too far.
- Stomach sleepers: firm, with a thinner comfort layer on top.
- Heavier sleepers (over about 230 lbs): a firmer, thicker support core and a total height of 12 inches or more.
- Couples: choose for the heavier partner, or split the comfort layer down the middle so each side gets its own firmness.
Fire Safety: The Step Most DIY Guides Skip
Every mattress sold in the US has to meet federal flammability standards set by the Consumer Product Safety Commission: 16 CFR 1632 (resistance to a smoldering cigarette) and 16 CFR 1633 (open flame). Manufacturers test complete mattresses to pass them. A stack of foam or latex you assemble at home hasn't been tested to either, and foam and many fabrics burn readily.
Careful
Build a fire barrier into your DIY mattress. Use a barrier made for mattresses, such as a fire-barrier fabric or "sock" sold for that purpose, or a mattress cover with a built-in barrier, and ask the seller which standard it has been tested to. Wool is a common barrier material in commercial mattresses, but whether a particular layer is enough depends on its weight and how the whole mattress is built, which is exactly what the federal test checks.
- Check local rules. Landlords, dorms and other shared housing may have their own rules about mattresses, so check before you build one for a space like that.
- Keep the barrier closed. The barrier only helps if it fully wraps the layers, so close every seam and keep the cover zipped.
- Keep heat sources away. Don't place a DIY mattress against a space heater, radiator or candle, and never smoke in bed.
- Don't sell it. The federal rules apply to mattresses offered for sale, so a homemade mattress is for your own use.
Our guides to fiberglass in mattresses and chemicals in mattresses explain how commercial mattresses meet the fire rules and what to ask a seller about the barrier.
Time to Build Your DIY Mattress
Materials in hand? Clear a large, clean floor space (or work directly on the bed base) and put it together.
-
Measure and cut the layers
Decide on the size: twin, full, queen or king. Our mattress size chart lists the standard dimensions. Buying layers already cut to a standard size saves the hardest part. If you do cut foam, mark a straight line with a straightedge and use a serrated or electric knife held upright; our guide on how to cut a foam mattress walks through it. Measure twice, cut once.
-
Set up the base
Put the bed frame or foundation in place first. Slats should be close together (many mattress makers ask for no more than 3 inches apart), and larger beds need a center rail with support legs. A solid platform or a slatted base works better than an old box spring; see do you need a box spring.
-
Lay the support layer
If your cover has a full zipper, open it on the base and build inside it. Place the support core first: a coil unit, firm latex or high-density foam, usually 6 to 8 inches. Make sure it sits flat and square, with even edges all the way around.
-
Add the comfort layers
Lay the firmer comfort layer next, then the softer one on top. Line each layer up with the edges of the one below so there are no gaps, lumps or overhangs.
-
Test the feel
Before you close anything, lie on it in your usual sleep position for several minutes. Too firm? Swap in a softer top layer. Too soft? Move the firmer layer to the top or use a thinner comfort layer. This is your mattress, so take your time.
-
Close it in the cover and fire barrier
Wrap the layers in your fire barrier if it's separate, then zip or sew the cover closed. Pull the cover straight so the corners sit square, and add a waterproof mattress protector before your sheets.
Sewing Your Own Cover
If you're sewing the cover yourself, measure the finished stack (length, width and height) first, then:
- Cut the fabric about 2 to 3 inches larger than the mattress on all sides, allowing for the mattress height and the seams, so it fits snugly.
- Sew three sides together with a straight stitch and heavy-duty thread for durability.
- Insert the layers carefully. They should fit snugly, but don't force them in, which can bend the edges out of shape.
- Close the fourth side with a zipper if you can, so you can open it later. Otherwise, sew it closed tightly.
Tip
If sewing isn't your thing, fabric adhesive can close the seams. It won't be as tidy or as strong, so a zippered cover is the better long-term choice.
Keep the layers in place: a snug cover is usually enough to stop layers from shifting. If they creep, a few Velcro strips between layers hold them without glue, so you can still take the mattress apart.
The Easier Route: A DIY Hybrid Mattress Kit
If you like the idea of choosing your layers but not of cutting foam and sewing a cover, a kit-style mattress is the middle ground. Our DIY Hybrid Mattress With Latex arrives as separate parts in three or four boxes, and you assemble it on your bed frame.
8"Pocket coil support core
2"Organic Dunlop latex per comfort layer
15-30 minTo assemble, no tools needed
120 nightsTrial (try it at least 30 nights)
| Part | What you get |
|---|---|
| Support core | 8" QuadCoil pocket coils from Texas Pocket Springs: 98% recycled steel, 15.5-gauge coils, glue-free, with a firmer 13.5-gauge edge row on Full and larger sizes. From 612 coils (Twin) to 1,224 (King). |
| Comfort layer | GOLS-certified organic Dunlop latex, 2" per layer, with 7 zones. The 10" mattress has one layer; the 12" has two. Choose Soft, Medium, Firm or Extra Firm, or ask for a different firmness for each layer of the 12" in a cart note. |
| Cover | Zippered organic cotton cover with two layers of natural New Zealand wool, which the product page lists as its fire-resistant layer, with no chemical flame retardants. |
| Sizes | Twin, Twin XL, Full, Queen, King, Split Queen and Split King |
Assembly follows the same order as a homemade build: spread the cover on your base and unzip it, put the coil unit inside, lay the latex on top and zip it closed. Read more about the coil unit in our Texas Pocket Springs guide.
Good to know
In the Split Queen and Split King, only the latex is split, so each side can have its own firmness; the coils and cover are one piece. For two completely separate mattresses, for example on a split adjustable base, the product page recommends two Twin XL mattresses instead.
Unlike a homemade mattress, the kit comes with a 120-night trial (sleep on it at least 30 nights first), a free latex layer swap if the firmness isn't right, a 20-year limited warranty that covers the coils, and free shipping in the contiguous US. Most orders ship the same business day from Charlotte, NC. Prefer all latex? Our 7 Zone Organic Latex Mattress is built the same open way, with separate latex layers in a zippered organic cotton cover, so you can unzip it, see every layer and rearrange them. You can compare all our hybrid mattresses too.
Customize Your Mattress: It's All About You
One of the best things about a DIY mattress is that you can keep adjusting it. Like your bed soft? Add more comfort layers. Prefer it firmer? Keep the comfort layer thin. There's no single right answer, just what feels good to you.

Beyond all-foam builds, you can also make a hybrid by combining comfort layers with a pocket coil core. Hybrids pair the cushioning of foam or latex with the bounce and airflow of coils. A hybrid with latex on top is a good choice if you want natural materials and a balanced, responsive feel.
Adjusting Firmness
After a few nights you may find the feel isn't quite right. Don't worry: with separate layers, you can fix it without starting over.
| If it feels… | Try this |
|---|---|
| Too firm | Swap the top layer for a softer one, or add a soft latex or foam topper. |
| Too soft | Replace the top layer with a firmer one, move the firmer comfort layer to the top, or use a thinner comfort layer. |
| Different for each partner | Split the comfort layer into two side-by-side pieces with different firmness. |
Adding a Mattress Topper
If you're not ready to commit to a very soft layer from the start, add a mattress topper later. It's an easy way to change the feel without rebuilding the mattress. A 2 or 3 inch organic latex topper in a topper cover sits on top of the mattress, and our topper thickness guide helps you choose. Don't cut a latex topper down to fit a DIY build, though: our topper warranty excludes cut or altered toppers.
Optional Features
Want to go further? Sew handles onto the sides of the cover to make the mattress easier to move, and use a waterproof protector for extra protection, especially if you have kids or pets.
Caring for Your DIY Mattress (So It Lasts)
A few habits keep a DIY mattress in good shape for years.

1. Use a Mattress Protector
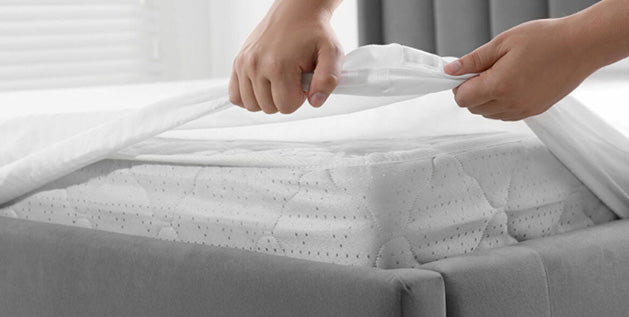
A waterproof mattress protector is a small investment that keeps spills, sweat and dust out of the layers. Foam and latex are hard to clean once liquid soaks in, so put one on from the first night. If you buy a ready-made mattress or kit, check the warranty: ours requires a waterproof protector from day one.
2. Rotate Your Mattress
Foam and latex can develop body impressions if you always sleep in the same spot. Rotate the mattress head to foot every few months. With a zippered cover, you can also rotate or swap the comfort layers themselves to even out wear.
3. Keep It Clean
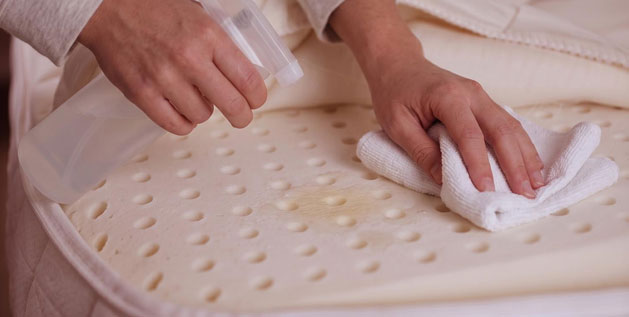
Every few months, vacuum the surface on low suction to pick up dust and crumbs. For stains, blot first, then spot clean with a little mild detergent and water. Don't soak it, because foam and latex take a long time to dry, and let it dry completely in a well-ventilated room out of direct sun before you remake the bed. Wash a removable cover only if its fabric allows it; covers with a wool or fire-barrier layer are usually spot clean only.
4. Keep the Right Base Under It
A sagging or widely spaced base can make even a well-built mattress feel uneven. Check the slats now and then, and add slats or a solid board if the gaps are wider than about 3 inches.
Tip
Air the layers out now and then. With the cover unzipped and the room well ventilated, moisture escapes and the layers stay fresh.
The Bottom Line
You now know what goes inside a mattress, how to choose and stack the layers, and how to build, test and look after your own. A DIY mattress gives you a bed made for your body, and because the layers stay separate, you can keep tweaking it whenever your needs change.

Whether you build from scratch or start with a kit, spend on a solid support core and a quality comfort layer, keep the layers in a zippered cover, and don't skip the fire barrier. Then go enjoy that well-earned night's sleep.
Frequently Asked Questions

SHOPPING FOR A NEW MATTRESS?
Choose 7, 10 or 12 inches and swap layers to change the feel. 120-night trial, free pillows with every mattress.
$719.20 $899.00From. Code BF20 is added at checkout.
Get exclusive offers by email
Sale alerts and new sleep guides. Unsubscribe anytime.
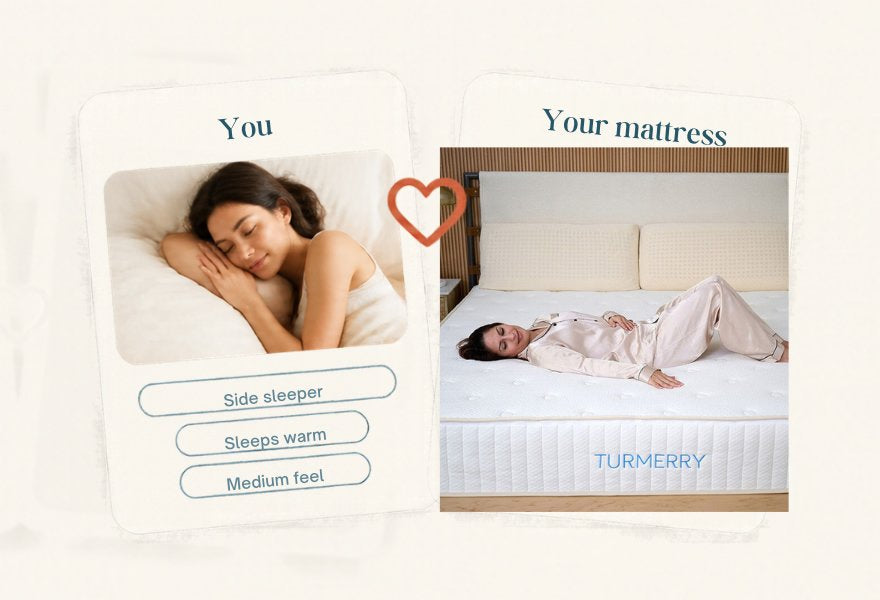
Shop what's in this guide
 7 Zone Organic Latex Mattress$719.20
 7 Zone Latex Mattress Topper$84.15
 Organic Waterproof Mattress Protector$50.15
 Organic Latex Pillow$83.30
Starting prices. Sale codes BF20 and BF15 are added at checkout.
Disclaimer: What is said in this article has been referenced from multiple sources and is intended only for educational and informational purposes. Please note that no content in this article is a substitute for professional advice from a qualified doctor or healthcare provider. Always consult an experienced doctor with any concerns you may have regarding a health condition or treatment, and never disregard any medical suggestions or delay in seeking treatment because of something you read here.
